


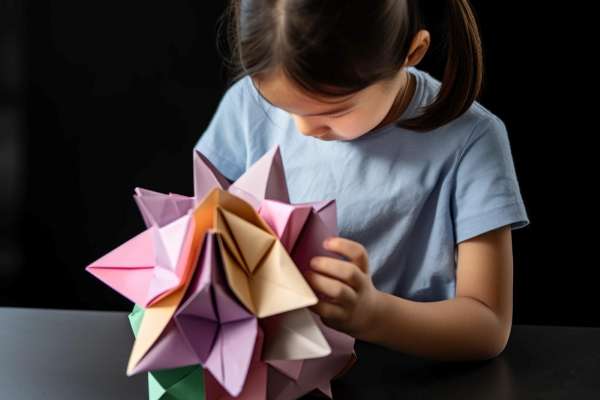
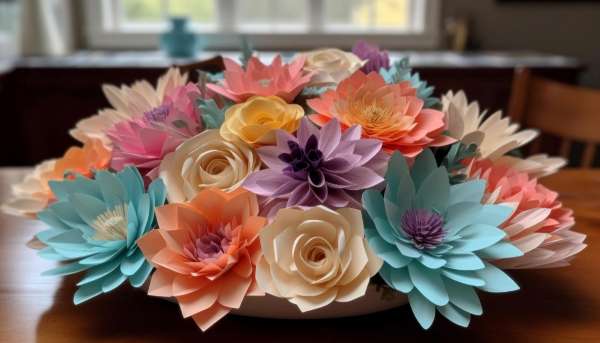
Crafting is like magic. With a wave of your hand (and maybe some scissors), you transform simple materials into something wondrous. And when it comes to crafts, knowing how to make paper flowers using construction paper is a game-changer. It’s straightforward and so much fun. Remember those moments when you felt like you needed a little touch of nature indoors? Paper flowers are your answer.
Now, think about the colors. Imagine vibrant reds, cool blues, sunny yellows, and gentle purples. All these can be in your space, brightening up your day. And the best part? You don’t need to water them, and they never wither. Plus, they’re a hit at events and parties. Ever been to a baby shower with cute pink paper roses? Or a birthday with decorative paper daisies? Those memories stick.
So, ready to embark on this exciting journey? By the end, you’ll have a garden crafted by your own hands. Let’s delve deeper into this art and see the magic unfold.
The Charm of learning how to make paper flowers using construction paper
Paper flowers have a unique charm that’s hard to resist. They’re like little memories we can touch, each petal a story, each color a mood. Think back to your childhood. Remember those school projects where you proudly displayed your first handmade rose? Or that time you walked into a party and were greeted by walls adorned with colorful paper blooms? Those moments are timeless.
But here’s where it gets even more fascinating. These aren’t just decorative pieces. They’re functional and versatile. Have an empty vase at home? Fill it with paper tulips. Need a quick gift for a friend? A bouquet of paper daffodils will do the trick. And if you’re looking to impress at your next gathering, a centerpiece of paper orchids gets everyone talking.
Now, if you’re wondering how to make paper flowers using construction paper, the process is simpler than you might think. With a bit of patience and creativity, you can craft blooms that might just rival the real thing! The beauty here is the journey – from a plain sheet to a lively flower, each step is an adventure
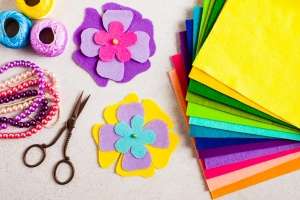
Materials Needed
- Construction and tissue paper in various colors
- Scissors (sharp enough to make clean cuts)
- Glue or tape
- Optional: pipe cleaners or straws for stems
Differences Between Construction Paper and Tissue Paper
Paper choices play a significant role in crafting. When it comes to making paper flowers, understanding the distinction between construction paper and tissue paper is vital.
Let’s break it down. Imagine construction paper as the sturdy backbone. It’s robust and doesn’t easily bend or fold unintentionally. When you’re crafting, this means it can stand tall and proud. Picture creating sunflowers or daisies with big petals; that’s where construction paper shines. Its thickness gives your flowers a pronounced and bold appearance.
Now, transition your thoughts to tissue paper. It’s the dreamy, whimsical counterpart. Think of it as the delicate touch, the soft morning light. With its lightweight nature, tissue paper is the go-to for those lush, full-bodied flowers. Want to create a peony or perhaps a fluffy hydrangea? Tissue paper is your best bet. It layers easily, allowing for volume and intricacy in your designs.
In conclusion, both types have their unique charms. How to choose? Reflect on the vibe you’re aiming for. If you’re looking for bold and structured, construction paper is the way. But if softness and intricacy appeal to you, grab some tissue paper and let the crafting begin!
How to make paper flowers using construction paper/tissue paper
Preparing the Paper
- Choose your preferred color.
- Flatten the paper on a clean surface, ensuring there are no creases.
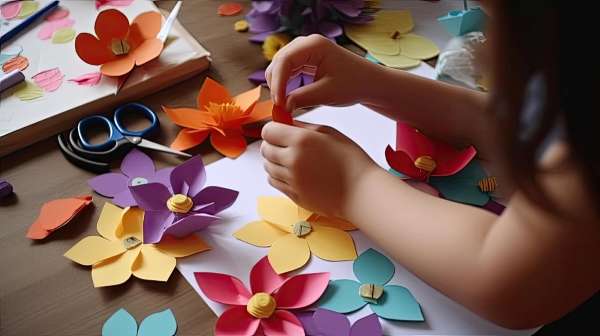
Designing Your Petals
- Fold the paper in half to ensure symmetry.
- Purpose: Folding the paper in half helps ensure that when you cut out your petal shape, both sides will mirror each other, giving a symmetrical and natural look to the petal.
- Possible Missing Step: Before folding, make sure your paper is smooth and free from any creases or wrinkles.
- Draw a simple petal shape – it can be oval, teardrop, or even heart-shaped.
- Purpose: Sketching the petal helps guide your cutting, ensuring uniformity if you’re making multiple flowers.
- Possible Missing Step: Choose a size for your petal. Depending on the overall desired size of your flower, you might want to decide on a specific dimension for the petals.
- Cut along the drawn line.
- Purpose: This step gives you the physical petal pieces for assembly.
- Possible Missing Step: If you want multiple identical petals, you could stack several folded sheets and cut multiple petals at once.
Assembling the Flower
- Arrange 5-7 petals in a circular pattern, slightly overlapping each.
- Purpose: Arranging the petals in a circle forms the basic shape of your flower.
- Possible Missing Step: Before gluing, you might want to dry-fit your petals, meaning you arrange without adhering them, to get an idea of the finished look.
- Glue or tape the base of the petals together.
- Purpose: This holds the flower together, ensuring its shape remains intact.
- Possible Missing Step: Use a flat surface to press and make sure the adhesive sticks properly, or consider using a quick-setting glue for a firm bond.
- For the flower’s center, cut a small circle from a contrasting-colored paper and glue it in the middle.
- Purpose: The center adds depth to the flower and makes it look more realistic.
- Possible Missing Step: Depending on the desired look, you can also crumple the center circle a bit to give it texture before gluing.
- If you’re using a straw or pipe cleaner as a stem, attach it to the back of the flower.
- Purpose: A stem allows the flower to stand or be arranged in vases.
- Possible Missing Step: Reinforce the back with tape or an additional piece of paper if the stem’s weight causes the flower to tilt or droop. If using a pipe cleaner, consider twisting the end to create a small “knot” for better support against the flower’s base.
DIY Tutorial: Crafting with Tissue Paper
Layering for a Fuller Look
- Choose your tissue paper color.
- Purpose: The color determines the overall aesthetic and mood of the flower. Bright colors can make a space lively, while softer colors may offer a more delicate touch.
- Details: Consider the room or event where the flower will be placed. Some colors may be more suitable for certain occasions.
- Stack 6-8 sheets on top of one another.
- Purpose: Stacking multiple sheets gives volume to the flower, making it look fuller and more lifelike.
- Details: Ensure the edges of each sheet align well to make the subsequent steps easier.
Folding and Shaping
- Starting from one end, accordion-fold the stacked papers in approximately 1-inch sections.
- Purpose: This creates the basic structure and ruffled look of the flower petals.
- Details: Ensure each fold is sharp and crisp. Using a ruler or a flat edge can help in achieving even folds.
- Once fully folded, use scissors to round the edges, giving your petals a natural look.
- Purpose: Rounding the edges mimics the natural curvature seen in real flower petals.
- Details: Be consistent in the rounding across the entire edge to maintain symmetry.
Finishing Touches
- Twist a pipe cleaner around the middle of the folded paper, leaving one end longer – this becomes the stem.
- Purpose: The pipe cleaner not only serves as the stem but also keeps the folds in place.
- Details: Ensure the pipe cleaner is twisted tightly enough to hold but not so tight as to tear the tissue paper.
- Gently separate each tissue layer, pulling them towards the center and fluffing them to create a full bloom.
- Purpose: Separating the layers brings out the volume and shape of the flower.
- Details: Handle with care; tissue paper is delicate and can tear easily.
- Adjust the petals as desired to shape your flower.
- Purpose: Personal touch and adjustments can give the flower a unique and desired appearance.
- Details: There’s no right or wrong way here; the beauty of DIY is making it your own.
Style and display after learning how to make paper flowers using construction paper
After putting effort into creating these beautiful paper flowers, it’s time to let them shine. First off, think about the ambiance you want to create. If it’s a peaceful, calming environment, maybe opt for pastels and muted colors. For a lively atmosphere, bright and contrasting colors can work wonders.
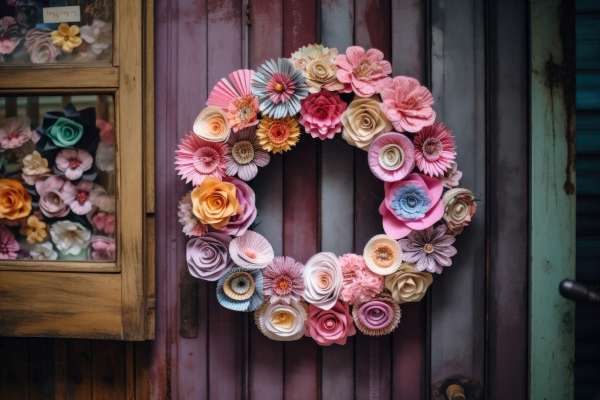
Now, where to put them? A vase on a coffee table or a windowsill can transform a room instantly. Picture a bouquet of your handmade flowers greeting you every morning. Blissful, right? For those special occasions or festive seasons, a door wreath made of your colorful blooms can make a welcoming statement.
Lastly, ever considered a feature wall? Here’s where you learn how to make paper flowers using construction paper really pop! Imagine a backdrop of cascading flowers in a gradient of colors, or perhaps a random assortment for that wildflower look.
It’s not just about decorating; it’s about creating an experience.
Care and Storage of Paper Flowers
These paper flowers, simple as they might seem, hold a piece of our heart and creativity. That’s why giving them a little extra care can make them last longer and stay pretty. Firstly, it’s essential to keep them in places where they stay dry. Humidity or any dampness can be a spoiler, making them lose shape and color.
Now, we all know the sunshine feels great, but direct sunlight? Not so friendly to our delicate creations. Just like how faded curtains tell tales of the sun’s intensity, our paper flowers can lose their vibrant charm if exposed too long.
Here’s where “how to make paper flowers using construction paper” blends with care tips: these flowers might be sturdy, but they have feelings too! Okay, not really feelings, but you get the point. Avoid placing them under books or any hefty items. They need their space, like a delicate ornament. And when it comes to cleaning? Think gentle. A soft brush or a light puff of air will do the trick. Remember, these blooms may not have life, but with the right care, they can light up your space for a long time.
FAQ
- What’s the difference between using construction paper and tissue paper for making flowers?
- Construction paper is thicker and can hold its shape better, while tissue paper is more delicate and can create softer, more voluminous blooms.
- Do I need any special tools to make paper flowers?
- The basic tools include scissors, glue or tape, and the paper of your choice. Optional items might include pipe cleaners or straws for stems, and perhaps markers or colored pencils if you’d like to add detailed designs.
- How long do paper flowers last?
- Paper flowers can last indefinitely if kept in proper conditions. They should be kept away from moisture and direct sunlight to prevent fading and damage.
- Can I make paper flowers with kids?
- Absolutely! Making paper flowers is a great activity for kids, as it’s not only fun but also helps improve their motor skills and creativity. However, younger children should be supervised, especially when using scissors.
- How can I make my paper flowers look more realistic?
- You can add details using colored pencils or markers, shape the petals using tools or your hands to give them a natural curve, or layer multiple pieces of paper for added depth and volume.
Conclusion
Isn’t it amazing how something as basic as paper can transform into intricate, vibrant flowers with just a touch of creativity? The art of paper flower crafting is a testament to the wonders of human imagination. From the tactile pleasure of folding and shaping to the visual delight of the final bloom, each step is a journey of discovery.
So, whether you choose the strength of construction paper or the delicate allure of tissue, remember that this craft is more than just an activity it’s an experience. A reminder that beauty can sprout from simplicity. The next time the world outside feels a bit too much, dive into this art. Let your hands and thoughts craft, and watch as your indoor space bursts into a riot of colors and joy!