


Finger painting is an age-old activity that never loses its charm. You know, it’s not just for kids; even adults can find joy in it. Ever wondered how to finger paint using washable paint? Well, you’re in the right place. First, let’s talk about washable paint. It’s a dream, especially for parents. Spills? No worries. A quick wipe, and it’s gone. Plus, it’s safe for kids. That’s a win-win.
Now, onto the homemade version using food coloring and sugar. It’s simpler than you think. Imagine making a sweet syrup, then adding color. Yep, that’s about it. And the best part? It’s budget-friendly and can be made with items you probably already have in your kitchen. For example, if you’ve baked a cake and used food coloring for the icing, you’re halfway there! Just add some sugar, and you’re set.
So, whether you go for the store-bought washable paint or decide to whip up your batch at home, the goal is simple: have fun, let loose, and create. So get read and enjoy how to finger paint using washable paint
Importance of learning how to finger paint using washable paint Finger

Finger painting is more than just a fun activity; for preschoolers, it’s a crucial tool for their holistic development. Here are the reasons why it’s essential:
- Motor Skill Development: The act of moving fingers across a paper helps children develop fine motor skills, strengthening the muscles in their hands that they’ll later use for writing.
- Sensory Exploration: The tactile experience of feeling the paint provides sensory stimulation. It allows children to understand and react to different textures and sensations.
- Cognitive Growth: Choosing colors, planning, and deciding where to place their fingers on the paper helps in the development of decision-making skills and problem-solving.
- Creativity Boost: Finger painting is a free-form activity that lets children express themselves without limitations, fostering imagination and creativity.
- Emotional Expression: Through colors and patterns, children can convey their emotions, helping them process feelings in a non-verbal manner.
- Enhanced Coordination: The coordination between eyes and hands is improved as children observe where they want to place paint and then execute that decision.
- Social Skills: When done in groups, it encourages collaboration, sharing, and understanding peer perspectives.
How to finger paint using washable paint
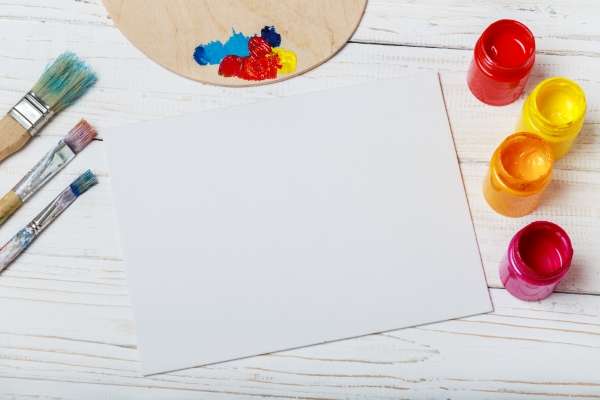
Materials Needed:
- Non-toxic, washable paints
- Shallow dishes
- Newspaper or plastic tablecloth
- Water (if needed)
Procedure:
- Prepare your workspace by laying out the newspaper or tablecloth.
- Pour your chosen paint colors into the shallow dishes.
- If the paint seems too dense, dilute it with a bit of water.
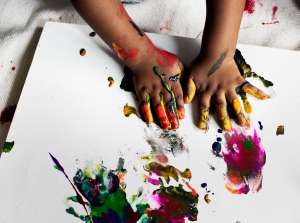
- Dive in! Dip your fingers into the paint and express yourself on paper.
- Once finished, leave the masterpiece to dry.
Tips & Precautions:
So, you’ve learned how to finger paint using washable paint. That’s fantastic! But, as with any art project, there are a few things you might want to keep in mind.
First off, cleanliness is key. Once the masterpiece is complete, washing hands should be the next step. You see, even though the paint is washable, leaving it on for too long can cause skin irritation, especially for sensitive little ones.
And speaking of spills, let’s be honest, they’re bound to happen. That’s the fun of it! So, dressing for the occasion is a smart move. Think old tees or, better yet, aprons. It not only protects the clothes but also adds to the whole artist vibe! Ever noticed how wearing a chef’s hat makes you feel like a pro in the kitchen? Same concept!
Lastly, have a blast. Because when you’re painting, it’s not just about the end result; it’s about the joy of creating.
Homemade Finger Paint Using Food Coloring and Sugar
Materials Needed:
- Cornstarch or flour
- Water
- Food coloring
- Sugar
Procedure:
- In a saucepan, combine sugar and cornstarch.
- Slowly integrate the water, ensuring a smooth mixture.
- Heat over a low flame, stirring consistently until the mixture achieves a paint-like consistency.
- After cooling, separate the mix into different containers for coloring.
- Add food coloring drops to each batch and stir until you’re satisfied with the hue.
- Let it cool, then it’s ready for artistic adventures!
The actual painting
Once the colors have been created, it’s time to set the stage for your preschooler’s artistic journey.
Lay down some sheets of paper, preferably thicker ones like construction or watercolor paper. This will handle the moisture of the paint better and reduce the chances of tearing. But hey, any paper works if you’re in a pinch!
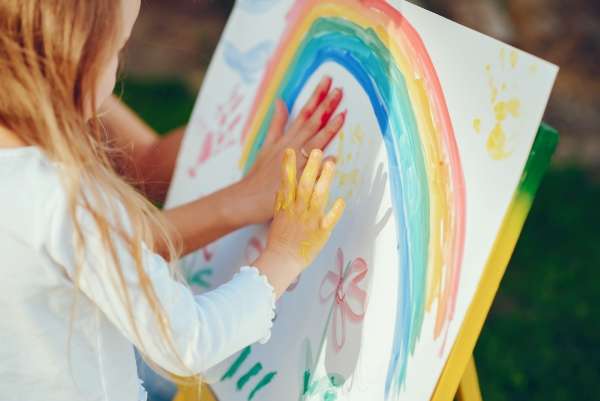
Now, let your preschooler dip their fingers into the paint. Encourage them to use one finger at first, and then multiple fingers or even their whole hand. They can make lines, dots, swirls, or even try to draw shapes or objects they recognize – like a sun, tree, or house.
Remember, there’s no right or wrong here. It’s all about exploration and expression. Maybe today they’re painting how they felt when it rained, or perhaps they’re creating an abstract piece that’s a dance of colors and emotions. You might be surprised at the stories they tell through their art.
Every now and then, introduce new tools like sponges or brushes, and see how they play with textures. The sky’s the limit!
Once they’re done, let the artwork dry, and then find a special place to display it. Celebrate their creation; after all, today’s doodles might be tomorrow’s masterpieces!
Tips & Precautions on how to finger paint using washable paint
- Children should be supervised, especially if they often place their fingers in their mouths.
- opt for thicker paper types like watercolor or construction paper.
- Excess sugar can be brushed off once the painting dries.
- Store leftover paint in the fridge for a maximum of a few days.
FAQs
- Q: Is it safe for my child to use homemade paints?
- A: Yes, the homemade finger paint recipe provided is made from edible ingredients. However, always supervise your child during the activity to ensure they don’t ingest large amounts.
- Q: How long does homemade paint last?
- A: If stored in a refrigerator, homemade paint should last a few days. Always check for any unusual smell or mold before using it again.
- Q: Can I use regular paper for finger painting?
- A: While you can use regular paper, thicker paper like construction or watercolor paper holds up better against the wet paint and reduces tearing.
- Q: My child ate some of the homemade paint. Should I be worried?
- A: The ingredients in the homemade paint are edible, but it’s not meant to be consumed in large quantities. If your child ingests a small amount, it’s generally safe. However, if you’re concerned, always consult with a pediatrician.
- Q: How can I ensure a mess-free finger painting session?
- A: While part of the fun is in the mess, laying newspapers or plastic tablecloths can help protect surfaces. Also, dressing your child in old clothes or aprons can prevent stains.
Conclusion
Painting is an exciting activity!
By now, you’ve figured out how to finger paint using washable paint. What’s next? Let’s talk about benefits. This isn’t just messy fun; it’s a developmental goldmine for preschoolers. Imagine those little fingers moving, swirling, dabbing. They’re not just creating art; they’re strengthening their motor skills.
But there’s more. It’s a canvas for their emotions too. Had a good day? Maybe you’ll see bright, bold strokes. Feeling a bit blue? Perhaps there’ll be some gentle swirls. It’s their way of communicating.
And remember, it’s not about the perfect picture. It might not always be a recognizable shape or pattern. But that’s okay. It’s about the process, the exploration. It’s like dancing without worrying about the steps.
So, next time you roll out that sheet of paper and see those tiny hands dive into the paint, smile. You’re not just watching an artist at work; you’re witnessing growth, expression and pure, joy.
We’d love to hear from you! Did you find this article helpful? Drop a comment below and share your thoughts on the article. Your insights not only help us but also our community of enthusiastic readers